
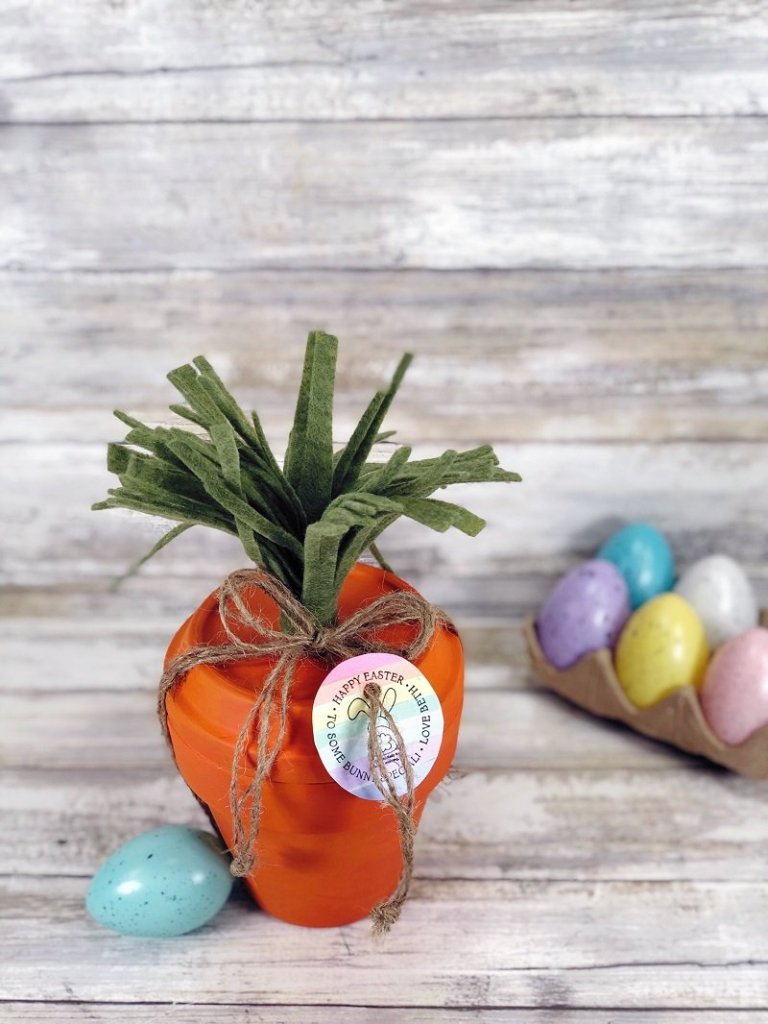
Y'all know how I like to upcycle items I already have around the house. This bright and colorful Clay Pot Carrot Container goes together quickly and easily with limited supplies I already had in my craft stash. Hide some treats inside and drop them off on your neighbor’s front porch for a sweet Easter, Passover, or Spring surprise.

How to Make a Flower Pot Carrot Container with Paint and Felt

This post, Clay Pot Carrot Container a 15 Minute DIY, contains affiliate links. Using links to these sites means I will earn a percentage of the purchase at no extra cost to you.
Here's what you need to make a Terra Cotta Pot Carrot:
- Clay Pot – 4” in diameter
- Clay Saucer – 4” in diameter
- Americana Acrylic Paint by DecoArt – Bright Orange, Jack-O-Lantern Orange, Canyon Orange
- Kunin Classic Felt Craft Sheet 9” by 12” – Olive Green
- Expressionery Stamp – Custom Design by Laura Kelly
- Tombow Dual Brush Pens
- Tombow MONOTWIN Permanent Marker Black
- Natural Jute Twine – Dollar Tree
- White Cardstock – to make a tag
- Glue Gun and Glue Sticks
- Scissors – I love my Fiskars!
- Paintbrush
- Hole Punch
- Metal Ruler
Here's how to create a Carrot Container from a Flower Pot:
STEP ONE
To begin Clay Pot Carrot Container, gather all materials then remove all packaging and labels. Basecoat clay pot and saucer with Jack-O-Lantern Orange Americana acrylic paint. Let the paint dry and then apply a second coat, if necessary. Once the clay pot and saucer are dry, apply random swashes of Bright Orange and Canyon Orange Americana acrylic paint to replicate the texture of a carrot.


STEP TWO
Measure a four-inch by nine-inch rectangle of Olive Kunin Felt with the MONOTWIN Permanent Marker, and then cut out with scissors. Fringe the nine-inch length of Olive Kunin Felt with scissors, leaving a one-inch section intact for rolling. Cut some narrow and some wide to replicate a carrot top.


STEP THREE
Using a glue gun and glue sticks, apply glue to the solid section of Olive Kunin Felt and roll as tightly as possible. Work in small sections and take your time with this step. Attach the felt carrot top to the center of the clay saucer with a glue gun and glue sticks. Hold tightly in place until the glue has cooled.


STEP FOUR
Stamp the Expressionery self-inking stamper on white cardstock and let the ink dry completely. This Easter design was created by my sweet friend Laura Kelly and can be customized with your name! Color tag with Tombow Dual Brush Pens, I love the bullet tip for coloring small areas. Add pastel strips with Dual Brush Pens and then stamp over top. Add a message on the back of the tag, cut out around the stamped image, and then punch a hole at the top center to create a tag.


STEP FIVE
Measure and cut three lengths of natural jute twine 36” each. Line up lengths of twine, wrap around the bottom of the pot, and secure at the top center with a bow. Thread the tag onto one of the tails of the bow. Knot the tails of the twine and trim any long ends with scissors to finish.

Quick and Easy Clay Pot Carrot Container for Spring
And you're done! I hope you love quick and easy crafts like my Clay Pot Carrot Container and you will use this project as a jumping-off point to showcase YOUR creativity!
Make a bunch of carrot containers from flower pots, fill them with sweet treats, gift cards, flower seeds, or even small games and give them to a friend, neighbor, teacher, or co-worker to brighten their Spring, Passover, or Easter.

Here are a few more clay pot and Spring crafts that I hope you will enjoy! Cute Bunny and Chick Clay Pots are great for Spring. Personalized Clay Pot Apples are the perfect gift for Teacher Appreciation coming up the first week in May. Colorful Clay Pot Love Bugs can be themed for almost ANY holiday and are fun to make with the kiddos.


Too busy to make this right now? Pin it for later! I'd love for you to pin this project to your favorite craft board on Pinterest and then it’ll be waiting for you when you’re ready.

Thanks for stopping by!


Beth, this is just the cutest thing! I’m pinning this for future reference. Would love to make as favors to sit at each place setting.
YES, Debbee! Make them a bit smaller as place cards. Love it!
Oh my! This is soooo cute! And so simple! Genius!
Thanks a bunch, Lisa! I was totally pleased with the way it turned out!
How fun, Beth! Thanks for sharing at Vintage Charm–pinned!
Thanks for pinning Cecilia!!
This is so cute Beth! Love it. Totally pinning. XO- MaryJo
Thanks a bunch, Mary Jo – easy too!
Your clay pot carrot is so adorable and such a clever idea. I love how easy they are to make too!
Thanks a bunch Marie!
This is absolutely adorable. I’ve pinned it to my Easter board–what a great decoration or a sweet gift for someone!
Thanks so much for joining the Grace at Home party at Imparting Grace. I’m featuring you this week!
Thanks for the feature, Richella!
This is so cute! It makes a fun spring decoration, Beth, and I’m thinking it anyone would love it as a gift. Even tiny pots can be turned into a carrot 🙂
Thanks for sharing at the FWF party!
hugs,
Rachelle
YES! It can be filled with so many different things, Rachelle, and I love the mini pot idea!
So cute and creative! Awesome!
Thanks a Bunch, Rebecca!!
I adore this clay pot carrot project! It’s like they were made for each other, plus such a unique way to offer up Easter treats!