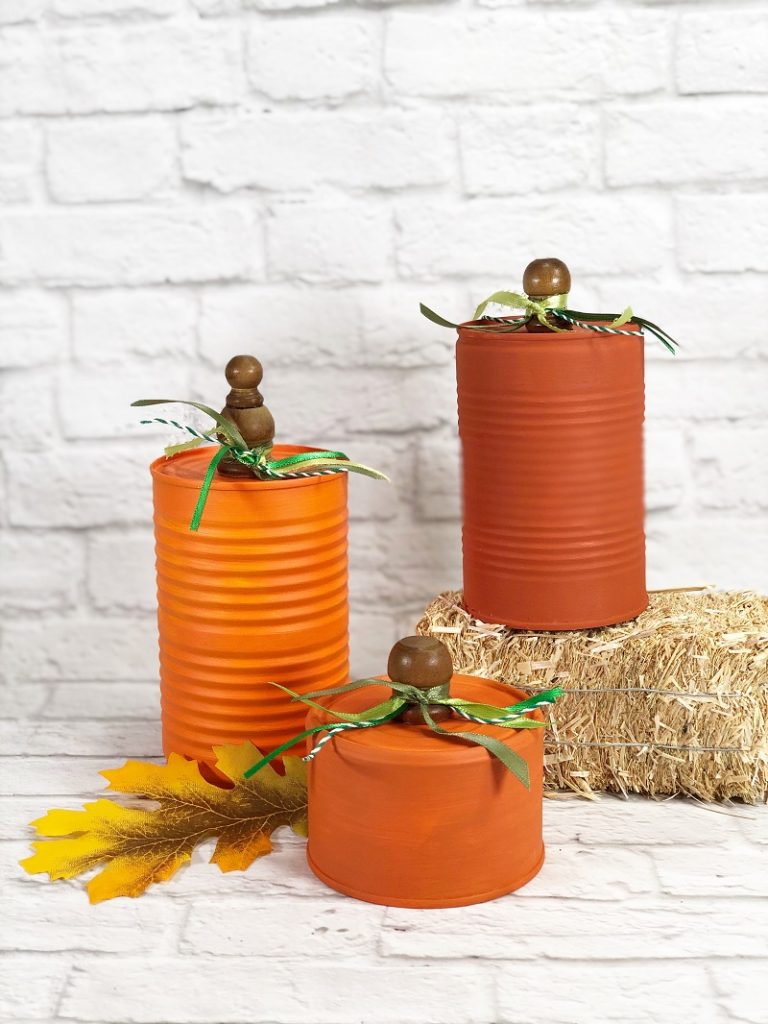
Today I will show you how to create Recycled Tin Can Pumpkins for Autumn with just a few simple supplies. My recycle bin is usually pretty empty because I am saving all the things that I could possibly upcycle into a craft project. I love to take items out of the trash and create fun, funky, and fabulous pieces of home decor, especially for holidays.

Recycled Tin Can Pumpkins for Home Decor

This post, How to Create Recycled Tin Can Pumpkins for Autumn, contains affiliate links. Using links to these sites means I will earn a percentage of the purchase at no extra cost to you.

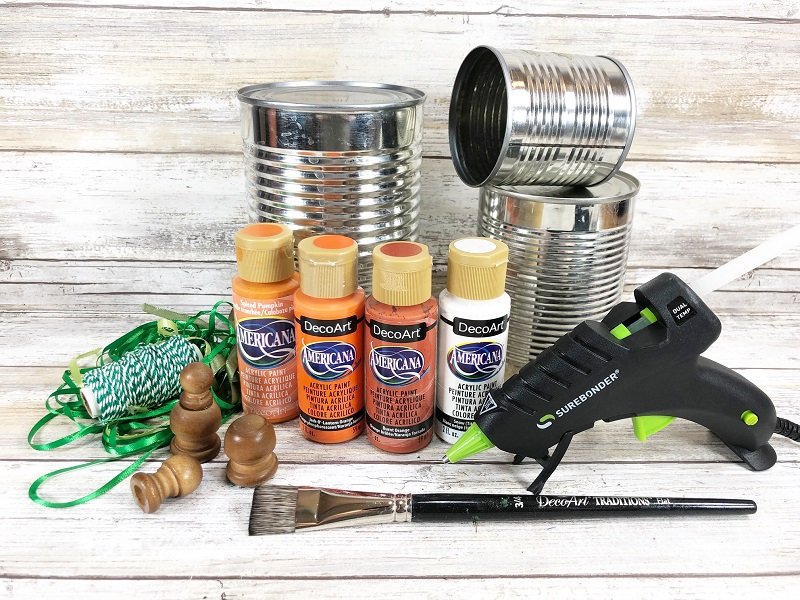
Here's what you need to make Tin Can Pumpkins from the recycle bin:
- Recycled Cans – (I used Large Bean, Soup, and Water Chestnut sizes)
- Wooden Finials, Three – Craft Store
- Ribbons, Green – Assortment
- Americana Acrylics by DecoArt – Titanium White, Bright Orange, Jack-O-Lantern Orange, Canyon Orange, Dark Chocolate
- Paintbrush
- Scissors – I love my Fiskars!
- Glue Gun and Glue Sticks

Here's how to create Pumpkins from Vegetable and Soup Cans:
STEP ONE
To begin the Recycled Tin Can Pumpkins, gather all supplies. Wash and dry the metal cans, then apply a basecoat of Titanium White acrylic paint. The white basecoat will allow the oranges to pop instead of getting lost on the metal cans. Basecoat the wooden craft finials with Dark Chocolate acrylic paint. Set aside to dry.

STEP TWO
Topcoat the largest can with Bright Orange acrylic paint with a paintbrush, the medium can with Canyon Orange acrylic paint, and the smallest can with Jack-O-Lantern Orange acrylic paint. Apply a second coat, if necessary, then set aside to dry.

STEP THREE
Attach the wooden finials to the top center of each can with a glue gun and glue sticks. I like to use a hot glue gun for craft projects like this because I am an impatient crafter, but a liquid craft glue would work as well. Instead of the wooden finials, use a small branch from the yard or a thick piece of craft rope.

STEP FOUR
Cut a variety of green ribbons in random lengths and tie around the wooden craft finials in knots, or bows. I used four different colors and types of ribbon and twine.

Trim the ends of the assorted green ribbons with scissors, I love my Fiskars. Use what you might have on hand, like yarn and embroidery floss.

Create Recycled Tin Can Pumpkins for Fall
I hope you will use my How to Recycled Tin Can Pumpkins project as a jumping-off point to showcase YOUR Fall Decor. This quick and easy craft project goes together in just about 30 minutes, including drying time. A fabulous way to recycle tin cans into farmhouse Fall décor! Get the kiddos involved and paint on Jack-O-Lantern features for a fun Halloween craft.

Additional Fall Decor Crafts
Smitha with Smiling Colors has created a funky and modern DIY Fall Wreath with felt leaves. Loving that color palette with the pops of hot pink and aqua!

Laura with Laura's Crafty Life has created a gorgeous DIY Fall Wreath with dollar store supplies. Click through to see her step by step tutorial.

Amy with Amy Latta Creations is sharing a Thankful for You project that becomes a porch surprise for a friend or neighbor. This fantastic gift was created with Cricut.

Cindy with My Creative Life is sharing a fun Craft Stick Scarecrow that you can make with the kiddos. A quick and easy craft project made with simple supplies.

Katie with The Crafty Blog Stalker (don't you love that name?) has created a beautiful Painted Pumpkin. Click through to see the quick hack she used to make that lovely pattern!

Sharing is Caring! If you LOVE it, Please PIN it!
Are you too busy to make these Recycled Tin Can Pumpkins for Fall Decor right now? Pin it for later! I'd love for you to pin this project to your favorite craft board on Pinterest and then it’ll be waiting for you when you’re ready.

I'd love to hear what you think about this project, or if you want to know more about pumpkins. If you've made your own recycled projects, I would love to see your creations! Share them on Instagram, and Facebook, or leave a comment/photo on the project pin on Pinterest! #CreativelyBeth


Thanks for stopping by!


These are cute. The wood finials make them.
Cindy
I love how easy and perfect these are!
Cute! And they look easy enough for kids to do!
Absolutely, Lisa! Different size hands would produce different size pumpkins!
These are sooooo cute!!! Pinned!
THANKS A BUNCH!!
Another fabulous pumpkin idea <3
THANKS A BUNCH, Julie! I think I might have to create a pumpkin crafts eBook!
Too cute, I love them. Fun craft with littles also.
Perfect for crafting with the kiddos, Melynda!!
These are adorable Beth! I love them and can’t wait to make them with my little man. Thank you for sharing your post at the Senior Salon Pit Stop! I’m excited to be featuring you at Monday’s party. Congrats! Pinned
Hugs,
Maria @ kraftyplanner.com
THANK YOU Maria! These pumpkins are SO EASY to make!
So creative and cute! And so simple, too, which is a must for me right now. 🙂 Visiting from Dare to Share.
YES! Simple is a theme for me right now as well, Jennifer!
These are SO cute Beth!! Pinning 🙂 Hugs- Tanya
Thanks, Tanya!! So quick and easy too!!
Beth,
The tin pumpkins are adorable. Congratulations, you are being featured on TFT. I hope you stop by. https://www.eclecticredbarn.com/2023/10/it-is-fall-yall-on-tft.html
Hugs,
Bev
YAY!! Thank you Bev for the feature! I’ll be sure to stop by!!
These are so cute!
THANKS A BUNCH! And so super easy to make Joanne!