
Do you miss the Mouse as much as I do? The Fall and Autumn decorations are my all-time favorite at Magic Kingdom, especially the Mickey Mouse jack-o-lantern wreaths. Using simple supplies from Dollar Tree, create this quick and easy mini version of the iconic Mickey Inspired Pumpkin Wreath in just about 30 minutes. I'll show you how!

Dollar Tree DIY Mickey Inspired Pumpkin Wreath

This post, Mickey Inspired Pumpkin Wreath Dollar Tree DIY, contains affiliate links. Using links to these sites means I will earn a percentage of the purchase at no extra cost to you.
Here's what you need to make a Dollar Tree DIY Disney Fall Wreath:
- Foam Pumpkin, 3” tall, One – Dollar Tree
- Mini Foam Pumpkin Clips, Two – Dollar Tree
- Americana Acrylics from DecoArt – Bright Orange, Jack-O-Lantern Orange, Canyon Orange
- Fall Silk Leaves and Flower Stems, Four – Dollar Tree
- Wooden Wreath Form, 6”
- MONO Twin Permanent Black Marker from Tombow
- Glue Gun and Glue Sticks
- Pencil
- Paintbrush
- Scissors – I love my Fiskars!
- MICKEY INSPIRED PUMPKIN WREATH PATTERN – download at the bottom of this post ⇓
Here's how to create a Mickey Jack-O-Lantern Wreath:
STEP ONE
To begin the Mickey Inspired Pumpkin Wreath, gather all supplies. Remove labels and metal clips from the large and small foam pumpkins. If the pumpkins are super shiny, rough up the exterior with sandpaper so the paint has a surface to stick to.


STEP TWO
Basecoat the large and two mini foam pumpkins with Americana Jack-O-Lantern Orange acrylic craft paint. Set aside to dry and apply a second coat, if necessary. Add a few strokes of Americana Bright Orange and Canyon Orange acrylic craft paint for depth and dimension.


STEP THREE
Mark placement of where the mini foam pumpkin Mickey ears should be on the large foam pumpkin Mickey head. Press the foam in with your thumb on the large pumpkin to flatten the areas where the mini pumpkin ears will be attached. Carefully attach the pumpkin ears with a glue gun and glue sticks. Hold the mini pumpkins firmly in place until the glue cools.

STEP FOUR
Using scissors, snip the leaves and flowers from the four silk stems. Attach the leaves in layers around the six-inch wooden wreath form with a glue gun and glue sticks. Glue additional leaves to the back of the wreath form to cover all of the exposed wood.


STEP FIVE
Download, print, and roughly cut out the Mickey Inspired Pumpkin Wreath Pattern at the bottom of this post ⇓. Scribble soft pencil lead onto the back of the image, layer on top of the large pumpkin, and trace around the Mickey face pattern with a ballpoint pen. Ink in Mickey’s features with the MONO Twin permanent black marker. The MONO Twin is perfect for this type of project because it has a larger bullet tip and a smaller extra fine tip.


STEP SIX
Attach the mini silk flowers around the wreath in odd numbers with a glue gun and glue sticks. Separate the petals from the larger silk flowers and tuck them in between the leaves. Glue the finished jack-o-lantern into the center of the wreath to complete the Mickey Inspired Pumpkin Wreath.


Download the Mickey Mouse Pumpkin Wreath Patterns

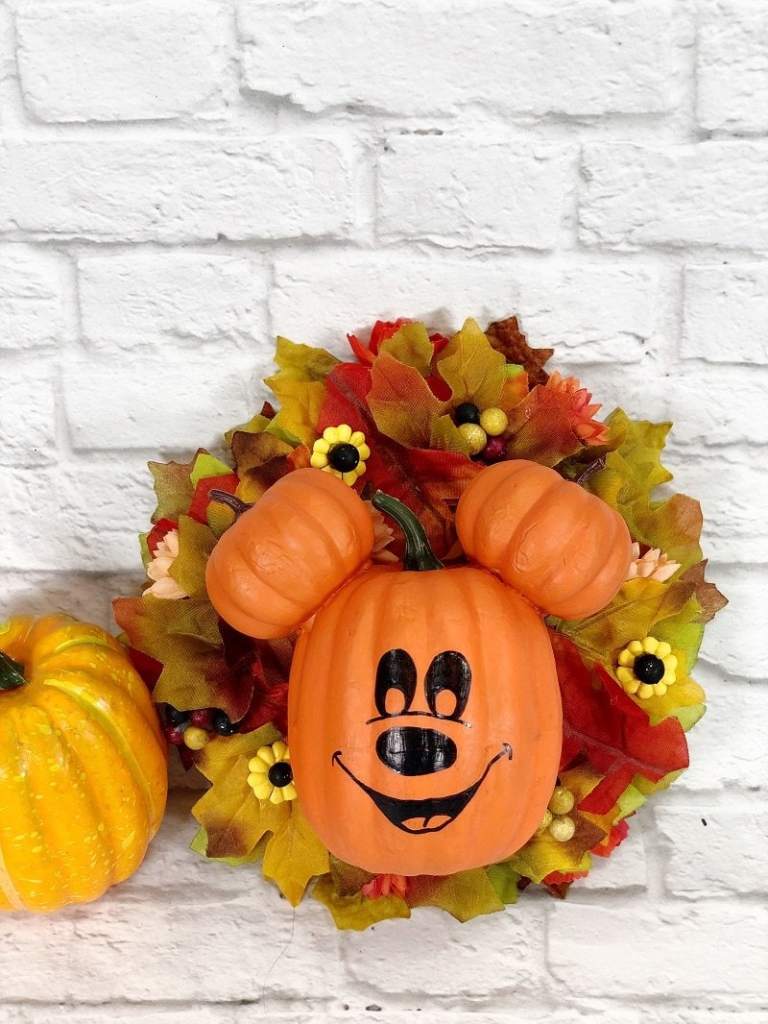
Mickey Inspired Pumpkin Wreath with Dollar Tree Supplies
Create this fun and iconic Mickey Inspired Pumpkin Wreath in just about 30 minutes with limited supplies from Dollar Tree. This mini version is the perfect size for tiered trays.

Y'all know that I love crafting with supplies that I find at Dollar Tree and being able to create Disney-inspired crafts is a definite bonus. I hope you will use my Mickey Mouse Jack-O-Lantern Wreath as a jumping-off point to create some fun, Fall crafts for your home very soon.
More Mickey and Minnie Mouse crafts can be found throughout my website, but here are a few that I know you will love! Disney Inspired Felt Bookmarks for Reading FUN! Quick and easy Mickey and Minnie Dollar Tree Christmas Ornaments.


Too busy to make this Disney Inspired Jack-O-Lantern Wreath right now? Pin it for later! I'd love for you to pin this project to your favorite craft board on Pinterest and then it’ll be waiting for you when you’re ready.

Thanks for stopping by!


Love this DIY Beth I think it turned out adorable! Congrats I decided to feature you at our Happiness Is Homemade Link Party #495 which goes live on Sunday! 🙂
YAY! That great news, Katie! I’ll be sure to stop by!
This is adorable Beth. I love it! Thank you so much for sharing it with us at the Senior Salon Pit Stop! I’m excited to be featuring your post at Monday’s party. Congrats! Pinned
Hugs,
Maria @ kraftyplanner.com
YAY!! Thank you for the feature, Maria!!
This is so cute, and I can’t believe it’s all from the dollar store! Hubby and I are headed to Disney tomorrow for our 10th Anniversary. Our first time going without kids – it will be so different! Thanks again for the great DIY!
YES!! Have the best time ever!!
Thank you!!!
Beth, you’re always creating the cutest crafts! Thank you for sharing it with us at Crazylittlelovebirds link party #3. 🙂
THANKS, Stephanie! I love creating projects from my HAPPY PLACE!!
This is darling. Something about Mickey always makes me happy. Great to hang on your hotel door if you are on vacay at Disney in the Fall.
YES, Michele, Mickey always makes me happy as well!
This is so perfect. We’ve been to Disneyland when it’s decorated for Halloween and you NAILED it! Featuring when my link party opens.
OH, thank you so much, Carol! You always hope that a projects turns out as good as you imagine it!