How to Stain a Wooden Box with Markers
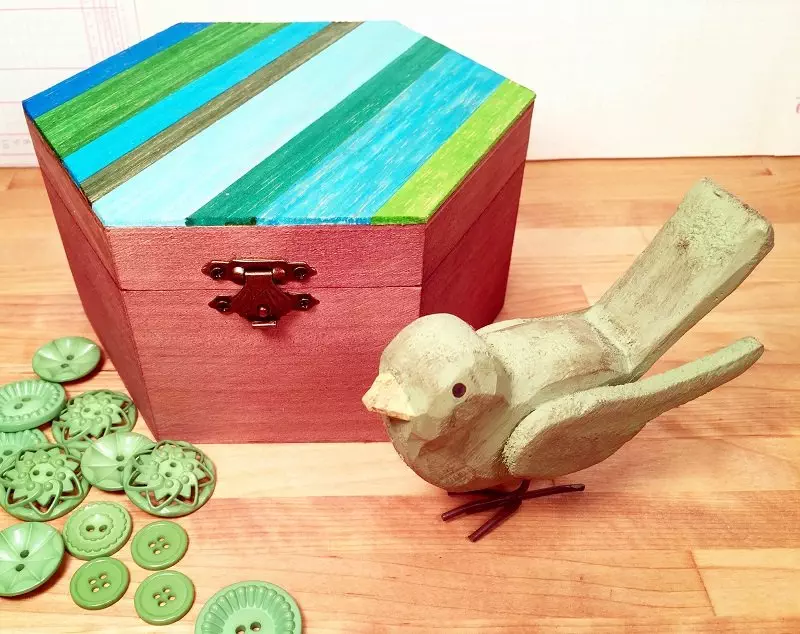
Today I am sharing how to stain a wooden box with markers. It is a quick woodcraft that you can make in about 15 minutes or less.
It’s all part of Craft Lightning Wood Crafts week, and I’m participating in this event with Angie of The Country Chic Cottage, Carolina of 30 Minute Crafts, and Laura of Pet Scribbles, and a bunch of other crafty and creative Designer friends! Make sure you click the links to see their fun DIY Wood projects (and TONS more inspiration)!
How to Stain a Wooden Box with Markers
STEP ONE
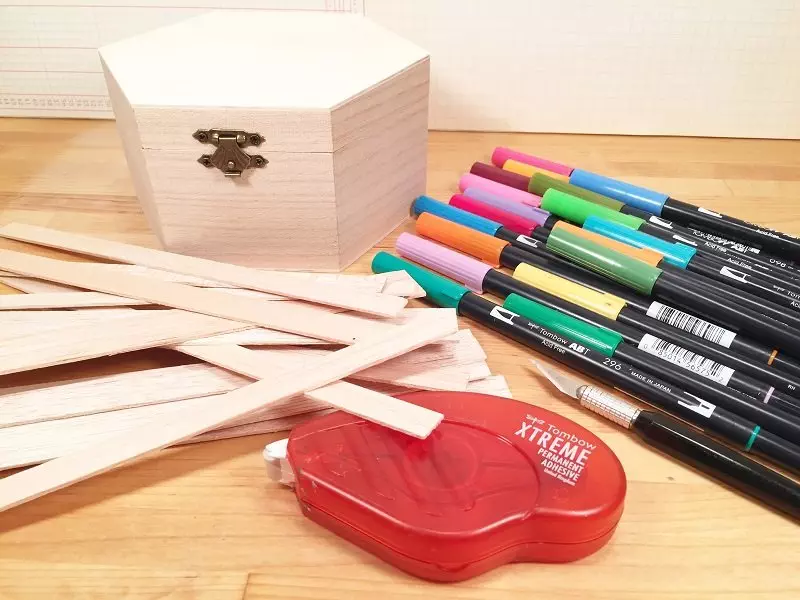
Gather an unfinished wooden box and a bag of pre-cut wooden craft strips. I had mine in my craft stash, which I have to say that I am totally into these days – using up my stash. “Stain” outside of wooden bow with Tombow Dual Brush Pen #977 Saddle Brown. Smooth out any stroke marks with a baby wipe.

STEP TWO
Select your pallet by gathering Tombow USA Dual Brush Pens. I used greens and blues 425, 373, 515, 173,451, 296, 195 and 185. Using long strokes, color the wooden strips with the pens – don’t forget the edges!
TIP – I took one of the wooden strips and tested out my colors to create my palette BEFORE I started coloring all of the wooden strips. The colors are a bit darker and more saturated on the wooden strips then they are on paper.

STEP THREE
Apply Tombow USA Xtreme Adhesive to back of each strip and apply to box top. I chose to create a diagonal pattern to create additional interest. Don’t worry about the overhang, we will take care of that in a minute! The Tombow USA Xtreme Adhesive creates a permanent bond that holds tight and fast, no waiting for liquid glue to dry on a project like this, which is great for last minute or impatient crafter – like me!
TIP – Remember that the Xtreme is such a strong adhesive that you have to “snap” it off at a 90-degree angle at the end of each run.

STEP FOUR
Flip box over, place on a self-healing mat and trim wooden strips with a craft knife. Make sure that you have your self-healing mat underneath BEFORE you begin this step. Don’t ask me how I know this LOL!

STEP FIVE
Flip box right side up and carefully color in the “raw” or cut edges with the co-ordinating Dual Brush Pens. Seal with a clear sealer like Americana Matte Spray Sealer/Finisher by DecoArt, in a well-ventilated area with several light coats.

I hope you have enjoyed my tutorial how to stain a wooden box with markers, and you will use this project as a jumping off point to showcase YOUR creativity!
As I mentioned earlier, a whole bunch of my blogger friends are also participating in Craft Lightning Wood Crafts week! Click the icon below to see ALL of the inspirational wood projects that are being created this week.
A new group of talented designers will be sharing their projects each day this week, so make sure to click over to see the tutorials and pin your favorites!
Thanks for stopping by!


This is a great idea! Thanks for joining!
Love this box, Beth! I especially love how saturated the colors look. I need to try this!