Dollar Tree Craft Pixel Heart for Valentine’s Day
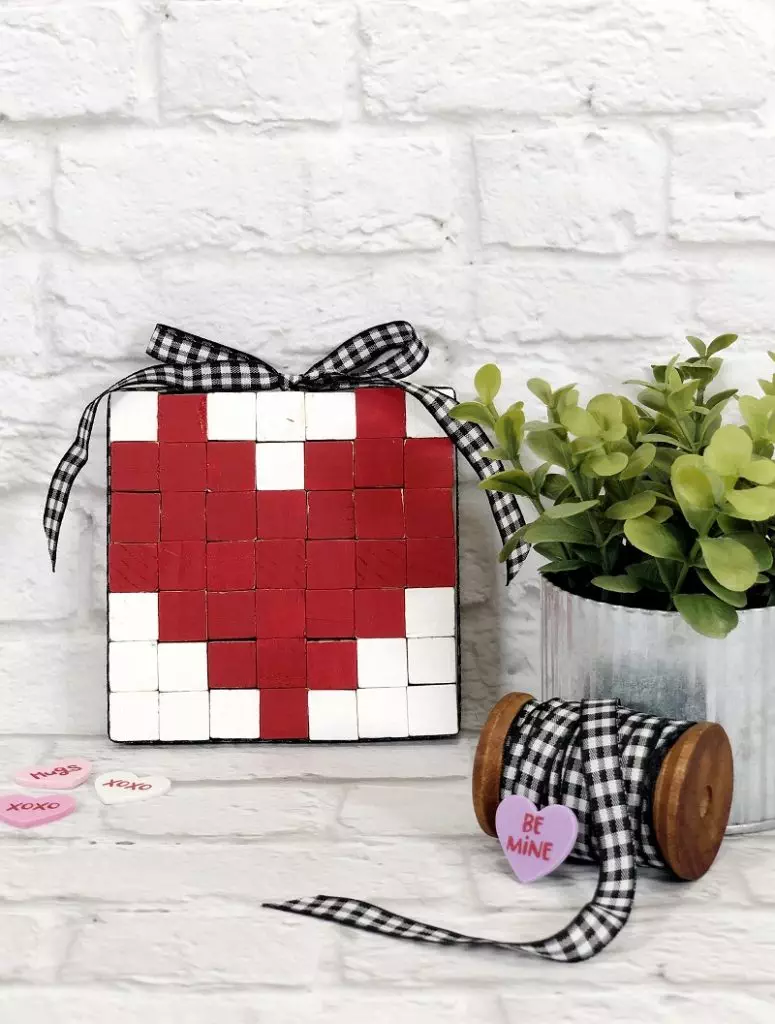
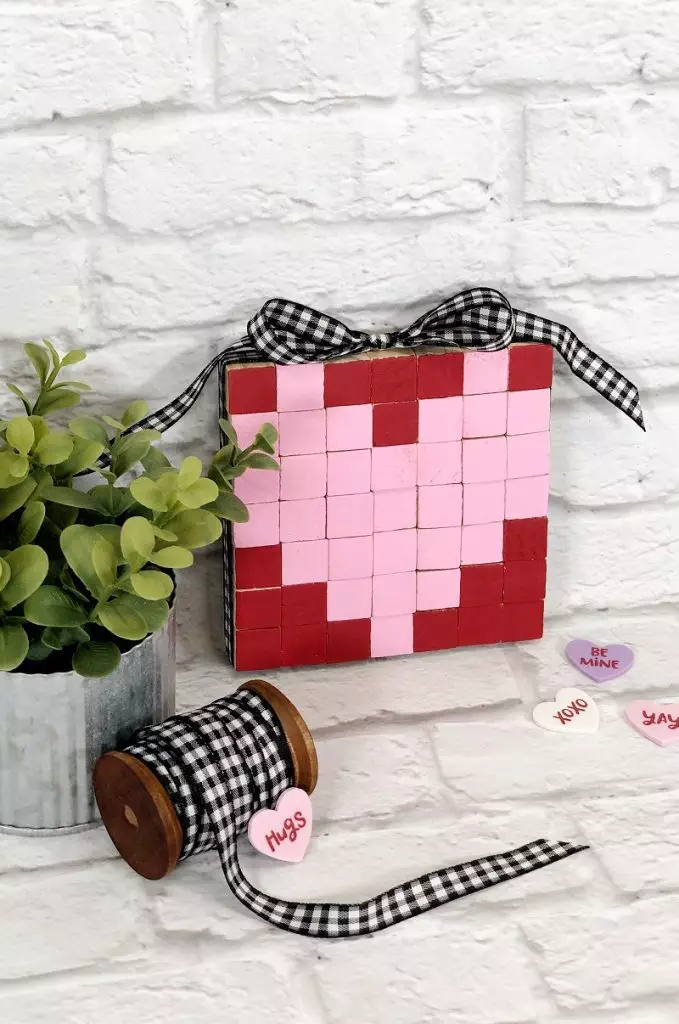
Create Dollar Tree Craft Pixel Heart Home Décor with just a few simple supplies. Fun for a tiered tray display, perfect with a gift card for a teacher's present, or even create a set of four as coasters! I love taking traditional and ordinary supplies and creating something special and unique. It is amazing what you can do with some paint and glue.

Valentine's Day Pixel Heart a Dollar Tree Craft

This post, Valentine's Day Pixel Heart a Dollar Tree Craft, contains affiliate links. Using links to these sites means I will earn a percentage of the purchase at no extra cost to you.

Here's what you need to make a Pixel Heart for Valentine's Day:
- Wooden Craft Cubes – Dollar Tree (2 packages)
- Americana Acrylic Paint from DecoArt – Baby Pink, Country Red, Titanium White
- Ribbon, Black and White Gingham – Dollar Tree
- Graph Paper – Dollar Tree
- Dual Brush Pens – Tombow
- Tombow MONO Multi Lquid Glue
- Rubber Bands – Dollar Tree
- Basecoat Paintbrush
- Scissors – I love my Fiskars!
Here's how to create a Pixel Heart with Dollar Tree Supplies:
STEP ONE
To begin the Pixel Heart Home Décor project, gather all supplies. Lay out 49 of the mini wooden craft cubes in a seven-by-seven square on your work surface. Using graph paper, create a pattern by coloring in the graph paper squares with a variety of colors of Dual Brush Pens. Tombow Dual Brush Pens are my favorite markers because they have a large brush tip for lettering and a smaller bullet tip for coloring and come in 108 bright and vibrant colors.


STEP TWO
Using the photo as a guide, paint the background blocks with Titanium White acrylic paint with a small flat paintbrush. Let dry. Paint the heart blocks with Country Red acrylic paint and set aside to let the paint dry completely. I love my Americana Acrylics from DecoArt because they have one-coat coverage on most surfaces.

STEP THREE
Once dry, flip all the mini wooden craft cubes over, keeping them in the same order. On the second side, paint all background blocks with Country Red acrylic paint. Using a small flat paintbrush, paint the heart blocks with Baby Pink acrylic paint. Let paint dry completely.

STEP FOUR
Attach the first row of blocks together using MONO Multi Liquid Glue and the fine tip applicator. Continue gluing blocks together until all seven rows are complete. Blocks will be slightly different in height and width, which just makes the project more unique. Then attach each of the seven rows together with MONO Multi Liquid Glue. Secure the square vertically and horizontally with rubber bands and set aside to allow glue to dry.


STEP FIVE
Once dry, wrap black and white gingham ribbon around the outside edge of the pixel heart block and tie in a knot at the top. Finish with a bow and trim the ribbon ends with scissors to prevent them from fraying.

Quick and Easy Pixel Heart Dollar Tree Craft
Create this super cute Dollar Tree Heart Pixel Home Decor in just about 30 minutes (not including drying time)! A fun craft activity to make with the kiddos to teach counting, colors, and patterns. Using graph paper design other images in a pixelated version to celebrate birthdays, holidays, and even create monograms. The possibilities are endless!


Create 5 Minute Wall Art Dollar Tree Craft with Valentine's Day gift bags and picture frames. And the bonus is that the gift bags come two in a pack for $1.25! I love taking simple everyday supplies and creating super cute home decor on a serious budget. These picture frames are quick and easy to swap out for different holidays and events.

I have been doodling and drawing since I was a kid, and loved making my own Valentine's for my classmates. Today I am sharing the cutest hand-drawn and hand-lettered Kawaii Inspired Valentine Cards to print and color. Perfect for the kiddos to give to their classmates!

Valentine's Day is the perfect time to tell the ones closest to you how much you love them. What better way to do that than with a cute as can be Kawaii Fortune Cookie Valentines? A keepsake reminder of love in an adorable cookie package with a sweet face. This hand-sewn and stuffed with my favorite super soft Poly-Fil® from Fairfield World™ is a quick and easy project to create in just about 30 minutes.

Sharing is Caring – Pin this for Later!
Too busy to make this Dollar Tree Heart Pixel Craft right now? Pin it for later! I'd love for you to pin this project to your favorite craft board on Pinterest and then it’ll be waiting for you when you’re ready.


Thanks for stopping by!


Hi Beth – I always love your projects and this one is no exception. You are always SUPER creative! Thank you for sharing this post on the Home Imagined Link Party.
Thank you so much for the kind words, Anna! Have a fabulous week 🙂
This is so cute! What a fun project. Thanks for sharing this post on the Will Blog for Comments #20 link party. Hope to see you there next week as well.
Thanks bunches, Jennifer! I love the pixel look!
Happy New Year! This is a very fun and clever Valentine card!
Pingback: Happiness Is Homemade 514 – Decor Craft Design
You come up with some of the neatest things to create!
Thank you for sharing at Gma’sPhoto ge•ner•ic Linkup Party. I look forward to ‘seeing’ you next week!
Take care and best wishes.
Thanks BUNCHES, Debra! I love crafting outside the box!
Love these Beth (pun intended). I am sure I have some of these supplies in my stash already but if not I know where to go! Featuring when my party opens 🙂
YES, Carol! Super quick and easy!
Beth, this is adorable! Thank you for sharing with us at The Crazy Little Love Birds link party #20.
Pingback: Happiness is Homemade 514 - A Labour of Life
Pingback: Happiness is Homemade 514 – A Labour of Life – Boomers
Pingback: Home Matters Linky Party #463 Valentine On Winter Ideas – Decor Craft Design
Pingback: Share Your Style #415