
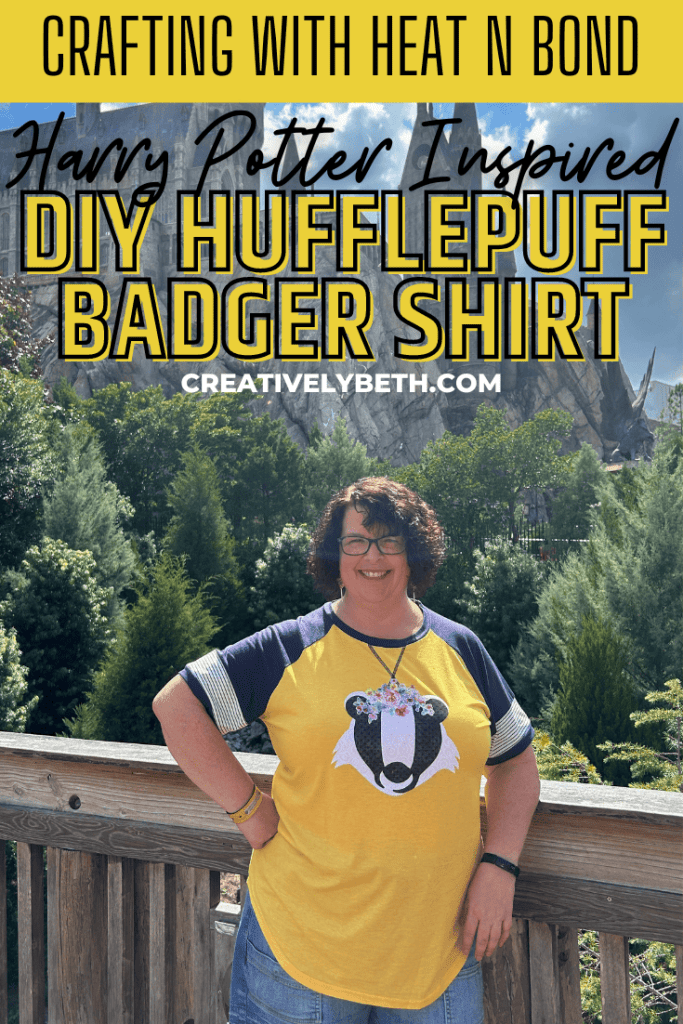
Show your Hogwarts House pride with a DIY Harry Potter Hufflepuff Shirt complete with free patterns. The Hufflepuff badger takes center stage with a floral crown on this tee shirt that is quick and easy to make with Heat n Bond UltraHold Iron-On Adhesive from Therm-O-Web. Make that next trip to the Wizarding World complete with a customized t-shirt that you can create in just about an hour with limited supplies.

Free Hufflepuff Badger Tee Shirt Patterns

This post, DIY Harry Potter Hufflepuff Shirt, contains affiliate links. Using links to these sites means I will earn a percentage of the purchase at no extra cost to you.
What do you need to make a Hufflepuff T-Shirt?
- HeatnBond UltraHold Iron-On Adhesive from Therm-O-Web
- Women's Yellow Tee Shirt
- Fat Quarter Cotton Fabrics – White, Black, Floral (found at Joann)
- Iron
- Ironing Board
- Detail Scissors – I love my Fiskars!
- MONO Twin Permanent Black Marker
- Ruler
- Hufflepuff Badger Patterns – download at the bottom of this post ⇓

How do you create a Harry Potter Badger Shirt?
STEP ONE
Wash and dry all fabrics with no fabric softener or dry sheets. Measure and cut three rectangles of HeatnBond UltraHold Iron-On Adhesive that are 8″ by 11″. Iron any wrinkles out of the fabrics. I like to use 100% cotton fabric for projects like this, and fat quarters from Joann Fabrics are the perfect size (and price)! Repeat by measuring an 8″ by 11″ rectangle on the white patterned, black patterned, and floral fabrics. Iron the shiny side of the HeatnBond onto the back of the fabric according to the package directions.


STEP TWO
Download and print the Hufflepuff Badger Shirt Patterns at the end of this post. There are two ways that you can transfer the patterns onto the HeatnBond paper backing. First is to layer the pattern on the bottom and the fabric on top with the HeatnBond paper backing facing up. Trace the pattern onto the paper with the MONO Twin Permanent Black Marker.

STEP THREE
The second way to transfer the pattern is to cut out the pattern with scissors and trace it directly onto the HeatnBond backing paper with the MONO Twin permanent black marker.

STEP FOUR
Cut out both patterns with scissors. I love using my Fiskars Detail Scissors for fabric projects like this fun Hufflepuff Tee Shirt.


STEP FIVE
Using detail scissors, fussy cut the floral clusters from the fabric. Dry fit the flowers together to make sure that you have enough pieces to create the floral crown for the badger.

STEP SIX
On an ironing board, dry-fit all fabric layers and pieces onto the tee shirt, using the photo below for reference. Remove the flowers and black pattern piece, and set aside.

STEP SEVEN
Heat the iron according to the HeatnBond package directions. Peel the paper backer from the white badger head pattern. Place the pattern on the shirt with the adhesive down and the fabric up. Iron it onto the shirt according to the package directions. Let cool and make sure that all edges are secure. If not, repeat the ironing process.

STEP EIGHT
Peel the paper backing from the black badger pattern. Carefully place the pattern adhesive side down and fabric side up on top of the white badger pattern. Line up the bottom edges of the ears. Iron on the black badger pattern according to the directions on the HeatnBond package. Let cool, and make sure that all edges are secured.


STEP NINE
Remove the paper backer from the flower clusters and lay them out across the top of the badger's head in an arch. Make sure that the adhesive is face down and the floral fabric is face up. Iron according to the HeatnBond package directions. Let everything cool and make sure that all edges are securely attached.

Free Printable Hufflepuff Shirt Patterns

Quick and Easy Harry Potter Hufflepuff Badger Shirt
Don't you love when a project that you have in your head turns out even better than you had imagined? I know I do and this one totally did! I absolutely LOVE this DIY Harry Potter Hufflepuff Shirt created with HeatnBond UltraHold from Therm-O-Web. HeatnBond has been a part of my crafting journey since I was in high school and made custom floral sweatshirts with my girlfriends. Therm-O-Web has entire lines of adhesives for all your fabric and paper crafting needs.

HeatnBond UltraHold from Therm-O-Web is a roll of paper-backed, iron-on, no-sew, double-sided adhesive for bonding fabric without the need for pinning. Ultrahold’s no-sew bond is stronger than traditional fusible webs. The solid sheet adhesive means edge-to-edge coverage for appliqué shapes on quilts, wall hangings, and attire without puckering or bunching. Draw or print directly on the paper backing to easily design appliqué pieces!

Sharing is Caring! If you LOVE it, Please PIN it!
Too busy to make this DIY Harry Potter Hufflepuff Badger Tee Shirt with Free Patterns right now? Pin it for later! I'd love for you to pin this project to your favorite craft board on Pinterest and then it’ll be waiting for you when you’re ready.
Additional Harry Potter Crafts and Free Printables
When I asked my favorite Harry Potter fan (aka my niece Josie) what craft we could make for her bedroom, she said a Harry Potter Deathly Hallows Pillow. Created with Kunin® Classic™ Felt, some Poly-Fil from Fairfield World, and fun antique gold trim in about an hour.

The magic of Harry Potter has enchanted me from the first words I read to my niece and nephew when they were too little to read themselves. I love how the words transported all of us to this fantastic world of spells, wizards, and friends. So, I went about capturing the mystery and enchantment in Four Magical Harry Potter Printable Quotes that you can print and color.

Straight out of the recycle bin, these Harry Potter Crafts DIY Cornish Pixie Jars are easy to make with my free printables. Quick and easy to create in about 30 minutes with supplies from Dollar Tree.

Harry Potter Inspired Hufflepuff Badger Shirt with Free Patterns


Thanks for stopping by!


Hi do you have patterns for the other HP houses? Thanks!
I am so sorry, Nicole, I do not.