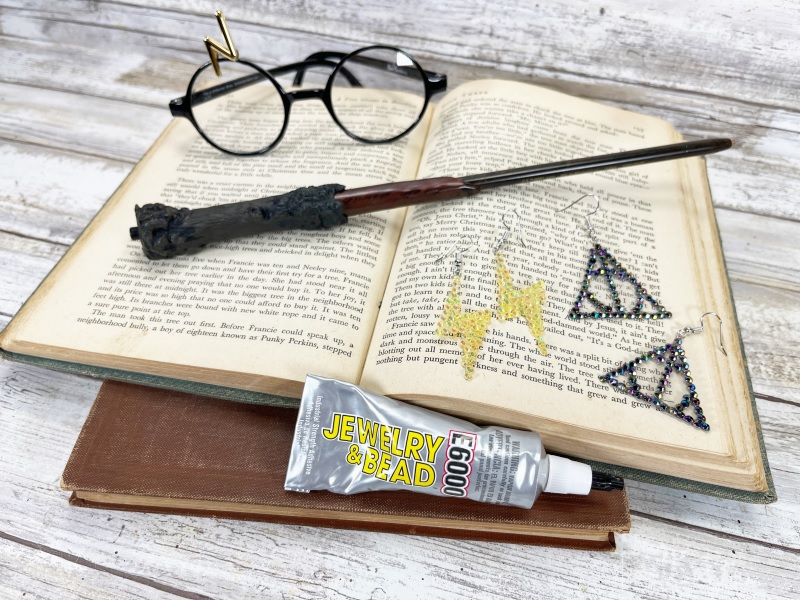
Create Harry Potter DIY Earrings quickly and easily with E6000 Jewelry & Bead glue, plus a few simple supplies. Show your wizard spirit with custom lightning bolt and deathly hallows earrings that don't have a custom price because the base is recycled plastic packaging! Full instructions and a FREE printable pattern sheet are included below to make this a fun project to complete in an afternoon or while watching your favorite Harry Potter movie.

DIY Harry Potter Deathly Hallows Earrings

This post, Harry Potter DIY Earrings, contains affiliate links. Using links to these sites means I will earn a percentage of the purchase at no extra cost to you.

Here's what you need to make Rhinestone Earrings:
- E6000 Jewelry & Bead Adhesive with Precision Tip
- Rhinestones, Loose – Yellow and Black (This set has everything you need)
- Plastic Packaging, Clear – Recycled
- Jewelry Findings – Eye Pins, Earring Wires
- Needle Nose Pliers – Two Pair
- MONO Twin Permanent Plack Marker
- Wax Pick Up Pencil
- Toothpick
- Scissors – I love my Fiskars!
- FREE PRINTABLE HARRY POTTER EARRINGS PATTERNS – download from the bottom of this post ⇓

About E6000 Jewelry & Bead Adhesive
I always read the directions and create a small test project before using a new to me glue such as E6000 Jewelry & Bead Adhesive on my finished project. To use the Precision Tips – puncture the seal in the neck of the tube using the black pointer cap. Replace cap. Screw the precision tip into the top of the tube cap. Replace with a fresh tip as needed. Always squeeze the tube from the bottom and roll up the tube as it empties. E6000 Jewelry & Bead Adhesive sets up quickly but I always allow 24 hours for curing. For future easy cap removal, apply a thin coat of petroleum jelly to the threads of the tube before replacing the cap. Not recommended for any items that come into contact with food, drinking water, or animals. Do not dry clean.

Here's how to create DIY Harry Potter Earrings:
STEP ONE
Using scissors, carefully remove the flat section from a package that includes clear plastic. Sometimes this packaging is called clam shell. The weight of the plastic is not important, only the size, and that it is flat.

STEP TWO
Download and print the HARRY POTTER EARRING PATTERNS at the bottom of this post ⇓ Trace the pattern onto the recycled plastic using a permanent black marker like the MONO Twin. Cut out the patterns with scissors. There are two sizes of each earring included on the pattern sheet.

STEP THREE
Open the E6000 Jewelry & Bead glue according to the directions above and insert the precision tip. Apply a thin line of adhesive down the center of the plastic shape, then attach an eye pin as pictured below. Repeat with the remaining earring shapes. Set aside to allow the glue to cure.

STEP FOUR
Once dry, flip the earrings over. Using the pattern sheet as your guide, apply E6000 Jewelry & Bead glue along the center line of the Deathly Hallows symbol, then attach black rhinestones with a wax pick up pencil. Straighten any wayward rhinestones with a toothpick. Repeat with the three sides of the triangle, and finally the circle. Use this same process with the second Deathly Hallows earring. For the Lightning Bolt earrings simply fill the entire shape with E6000 Jewelry & Bead glue and yellow rhinestones, working from the top to the bottom.

STEP FIVE
Hold the ring at the bottom of the earring wire in one hand with needle nose pliers, then carefully bend the joint open with needle nose pliers held in your other hand. Open in a twisting motion, not in a bending or prying motion. Insert the loop of the eye pin into the open loop of the earring wire. Close the earring wire in the same twisting motion as you opened it. Repeat with the other earrings and earring wires.

Download the Free Printable Harry Potter Earring Patterns Here
DIY Harry Potter Lightning Bolt Earrings
I wore my Harry Potter DIY Lightning Bolt Earrings around the Wizarding World recently and received a ton of compliments. Creating craft projects, especially jewelry, that looks like it was purchased in a store is one of my favorite things. The rhinestones shimmer and shine in the light and the see through nature of the recycled plastic packaging makes these earrings look expensive.
E6000 Jewelry & Bead glue gives you the control you need for precise, no-mess applications. The precision tips are perfect for permanently bonding rhinestones, gems, beads, and most types of jewelry metals. Package includes 4 precision tips. Easily bonds to polymer clay, metals, wood, leather, and much more! Dries clear and has maximum flexibility, plus it is waterproof (bond remains secure even when exposed to water).


Sharing is Caring! If you LOVE it, Please PIN it!
Too busy to make these DIY Harry Potter Lightning Bolt and Deathly Hallows Earrings right now? Pin it for later! I'd love for you to pin this project to your favorite craft board on Pinterest and then it’ll be waiting for you when you’re ready.

I'd love to hear what you think about this project, or if you want to know more about E6000 Bead & Jewelry Adhesive Precision Tip. If you've made your own Harry Potter projects, I would love to see your creations! Share them on Instagram, and Facebook, or leave a comment/photo on the project pin on Pinterest! #CreativelyBeth


Thanks for stopping by!


