
Happy St. Patrick's Day resin lovers! I recently took a class with a resin expert and learned a faux marbling technique that I wanted to try again. Especially when I discovered these wooden nesting shamrocks at my local craft store, I thought they would be perfect to fill with marbled resin – SCORE! Enviro Tex Lite is so easy to use, it mixes up quick, has a good open working time, and sets in 24 hours. Perfect for Marbled Resin Shamrocks!

DIY Marbled Resin Shamrocks
Here's how to make Wooden Shamrocks with Resin:
STEP ONE
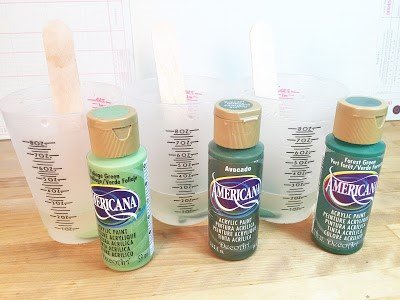
To begin the Marbled Resin Shamrocks project, basecoat wooden shamrocks with acrylic craft paint in light green, medium green, and dark green, let dry. Apply a second coat, if needed. Seal inside and outside of wooden shamrocks with ETI Ultra-Seal, making sure to seal the joints well. You don't want any resin seeping through.
Prepare your project for resin by finding a level surface that is out of the way and line with waxed paper, a non-stick craft sheet, or parchment paper. Place your project on this surface.
STEP TWO
Mix 3 oz. of Enviro Tex Lite resin and hardener in the plastic cup and stir for 2 minutes with the wooden stick. Make sure to scrape the bottom and the sides as you stir. I used my cell phone to time my mixing. Next, pour this mixture into a new plastic cup and stir for an additional 2 minutes with a new wooden stick.
STEP THREE
Divide the mixed resin into three cups, pouring 2 oz. in each cup. Squirt in a dime-size dollop of light green, medium green and dark green craft paint, one color in each cup.

Stir each cup of resin with a wooden stick until well mixed, about 30 seconds.
STEP FOUR
Carefully pour the resin into the wooden shamrocks. Be very careful not to pour in too much resin, you want it to just come up to the edge, not go over.

Spread the resin out in the wooden shamrocks with your stir sticks.

STEP FIVE
Pour small puddles of an opposite-colored resin into each shamrock. With a wooden toothpick, swirl the colors together to create a marbled effect.

Do not over mix your colors or you will end up with a muddy mess!

Remove any air bubbles by “huffing” over the surface of the resin with your hot breath. Let dry in an out of the way, but level, area for 24 hours. If you have pets, make sure to cover your project with an upside-down plastic bin to protect it from hair and paw prints!

STEP SIX
To finish the Marbled Resin Shamrocks project, attach resin-filled wooden shamrocks to a 24″ length of 1″ wide ribbon and tie a gold bow at the top of each shamrock for a bit of sparkle!

St. Patrick's Day Resin Home Decor
My Marbled Resin Shamrocks would make a great decoration for your front door instead of a wreath for St. Patrick's Day!
If you enjoyed this project, click through and check out my Holiday Icon Interchangeable Banner, perfect for St. Patrick's Day.
Thanks for stopping by!

