
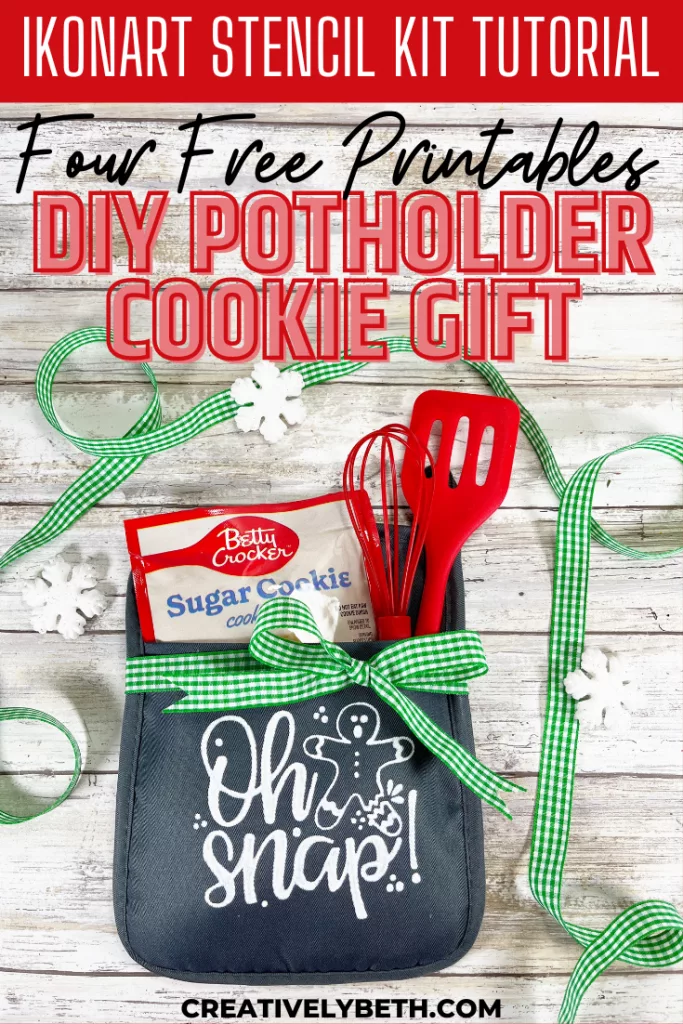
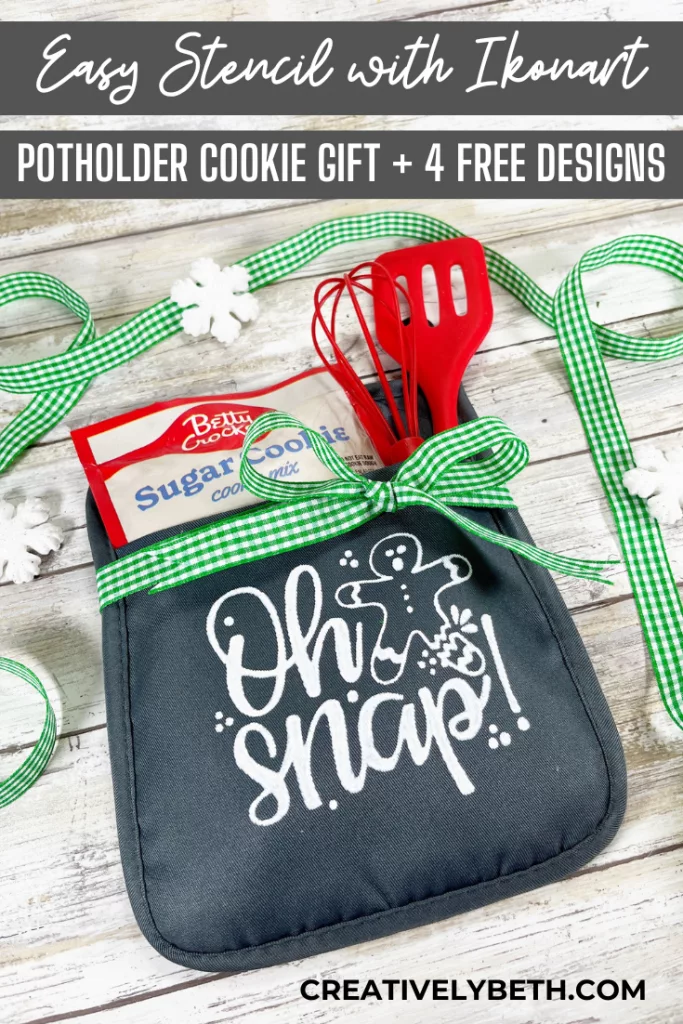
DIY Stenciled Potholder Cookie Gift for Christmas
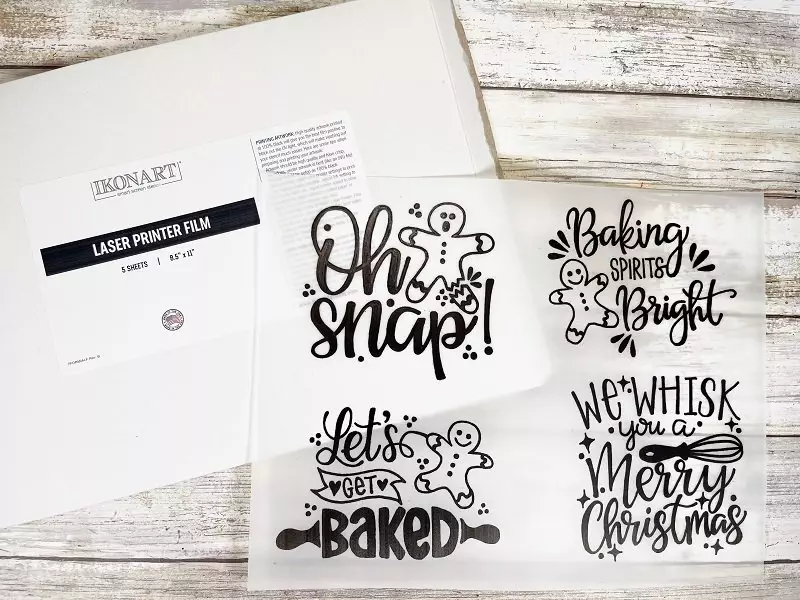
Create a DIY Stenciled Potholder Cookie Gift for Christmas with the Ikonart Stencil Kit. Personalize Dollar Tree potholders with my FREE Printable Funny Baking artwork using the Ikonart Custom Stencil Kit. Y'all know that I love to hand letter, doodle, and draw, so I have included FOUR free printable files that are perfect for potholders, oven mitts, and even kitchen dish towels. And with the Ikonart Custom Stencil Kit, making these personalized gifts is quick, easy, and inexpensive.
DIY Cookie Baking Gift with Free Printables
This post, DIY Stenciled Cookie Baking Gift with Free Printables, contains affiliate links. Using links to these sites means I will earn a percentage of the purchase at no extra cost to you.
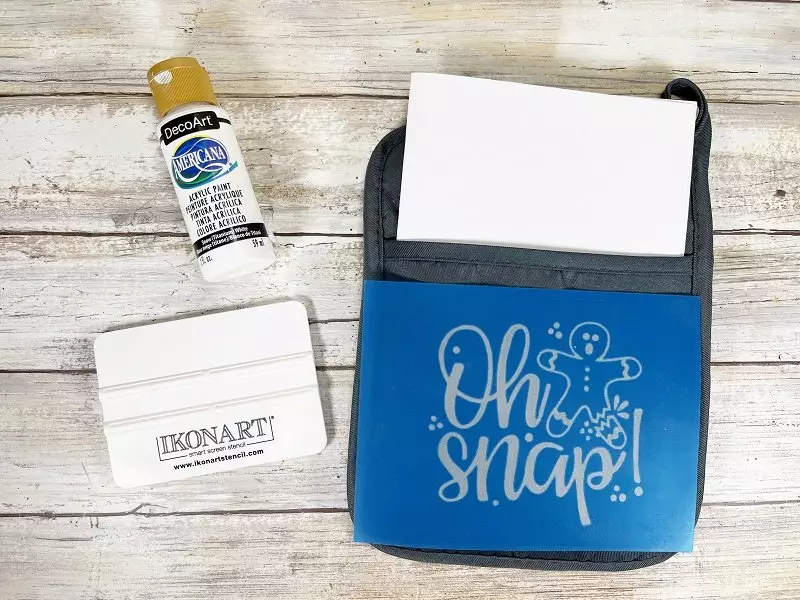
Here's what you need to create a Christmas Cookie Gift:
- Ikonart Custom Stencil Kit
- Potholder or Oven Mitt – Dollar Tree
- Americana Acrylic by DecoArt – Titanium White
- Printer – Laser or Inkjet
- MONO Twin Permanent Marker
- Scissors – I love my Fiskars!
- Cookie Mix – Dollar Tree
- Mini Whisk – Dollar Tree
- Mini Spatula – Dollar Tree
- Ribbon, Green Gingham – Dollar Tree
- FREE PRINTABLE CHRISTMAS POTHOLDER ART download below ⇓
Here's how to create Stenciled Potholders:
STEP ONE
To start the DIY Stenciled Potholder Cookie Gift with Free Printables, gather all your supplies. Head over to this post, DIY Stenciled Journal for all the beginner information about Ikonart Custom Stencil Kit and setting it up. Size the design to fit your final project, and print it out on either Inkjet Printer Film or Laser Printer Film depending upon which type of printer you have. Be sure to flip or mirror the image when dealing with words and follow all of the directions for the best results. The kit does come with a sample print if you want to see how the designs look when printed, and to make a stencil with it. Wash and dry the jeans without fabric softener. Download my Free Funny Baking Printables file below ⇓
STEP TWO
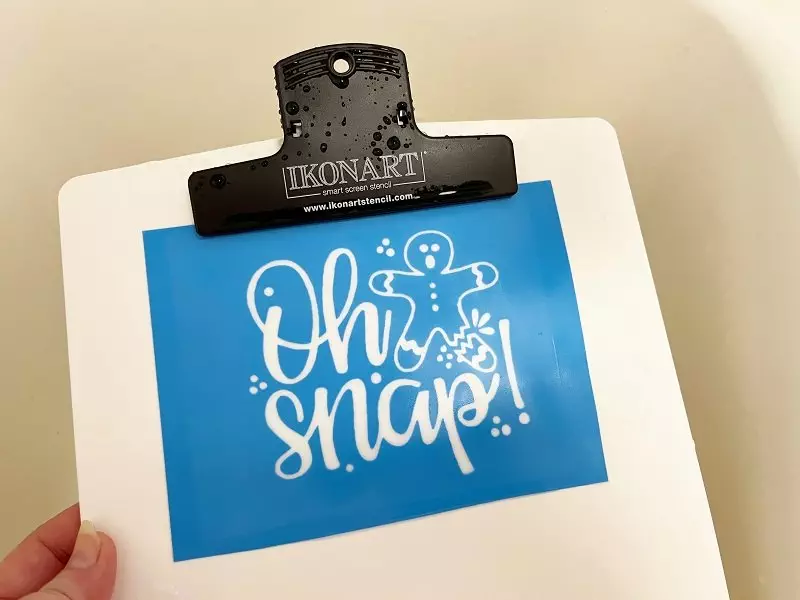
Next up is exposure. Set up the Ikonart exposure stand with UV LED Light by following the directions included in the kit. Ikonart Stencil Film is light-sensitive, so be careful to keep it out of the sunlight and bright interior lights before exposing it. Cut a piece of the blue exposure film the same size as your design.
Lay the piece of exposure film down on the base of the stand with the textured side facing up. Place the printed design on top of the film, making sure it's right-side-up, making sure that you can read any words in your design.
Place a clear exposure sheet from the stencil film pack on top and press to seal the design securely against the stencil film. Turn on the exposure light and expose the film for 35 seconds with inkjet printer film, or 30 seconds with laser printer film.

STEP THREE
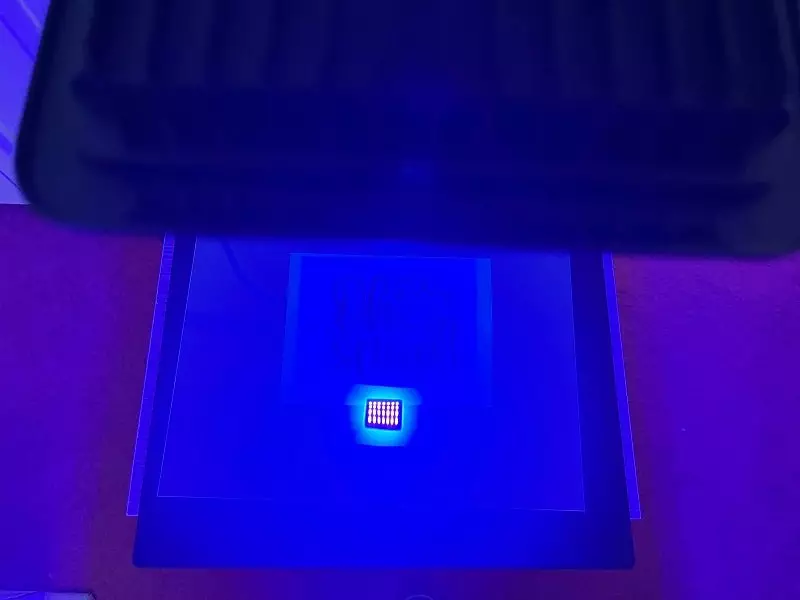
Next, the exposed stencil needs to be washed out or rinsed. After exposing the film, the design will not yet be visible. You can soak the stencil for up to one minute in warm water to speed up the rinsing process.
Clip the exposed stencil film to the Ikonart clipboard with the shiny side, or carrier sheet, touching the clipboard. Use the sprayer of your kitchen sink faucet to rinse the stencil film with warm water to reveal your design. Spray the stencil film evenly until the design shows through and becomes completely clear. The rinsing process should take about 3 minutes.
Hang the washed-out stencil to dry. My friend Lindsay taught me a trick, stick the wet stencil on the shiny carrier sheet on your sliding glass door to dry. NOTE: Make sure that the carrier sheet is on the back of the stencil film or it will permanently stick to the glass.

STEP FOUR
The last step is to post-expose, and it is important, so don't skip it! Once the stencil is completely dry, place the stencil film back on the exposure stand with the textured side up and post-expose for at least 2 minutes. The clear cover sheet is not needed. Note: Post-exposure increases the durability of the stencils and is very important. Use a MONOTwin Permanent Marker and write “back” on the carrier sheet (shiny side) on the back of the stencil for storage.
STEP FIVE
Now it is time to CREATE with your new Ikonart Custom Stencil. Peel the carrier sheet away from the stencil and set it aside, but don't throw it away. Carefully rub the stencil down and apply pressure to help it stick to the surface and get rid of any air bubbles. Add a little bit of Titanium White Acrylic Paint to the top of the stencil. Be careful not to go near the edges. If you feel like you need a little more room, you can place some painter's tape around the edges.
Cover all the open mesh areas of your stencil using the included Ikonart squeegee, a brush, or even your finger. Again, be careful not to scrape the paint off of the stencil edges.
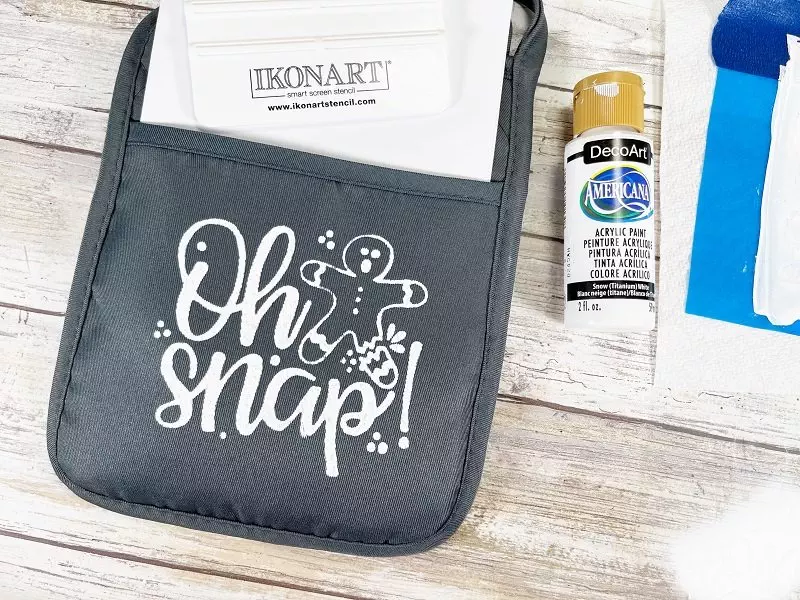
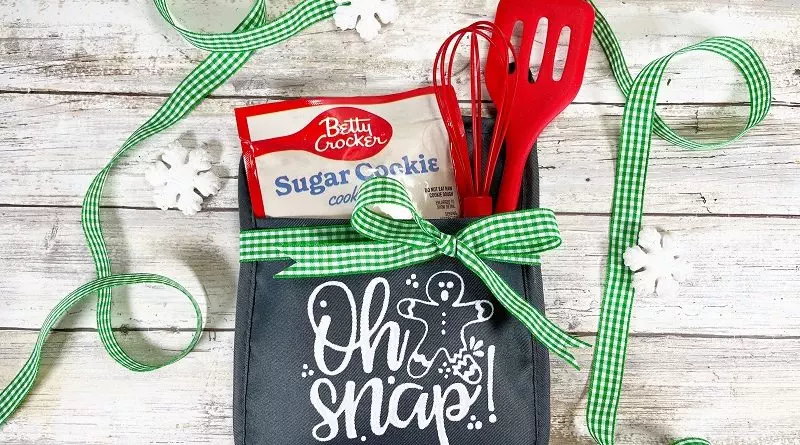
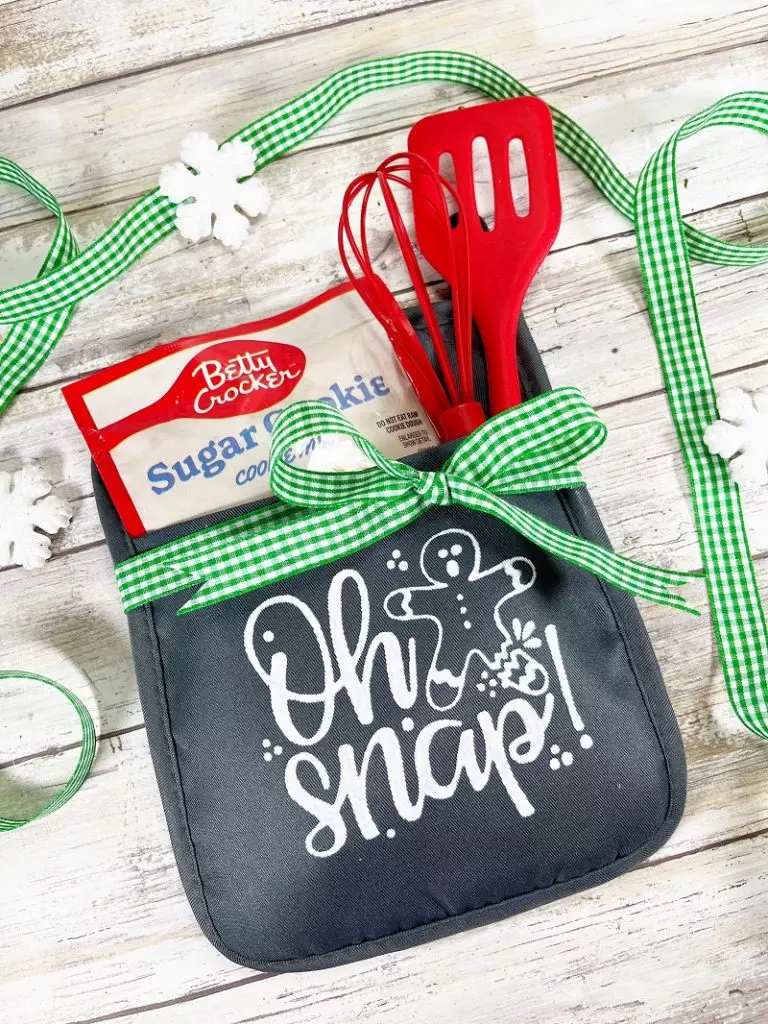
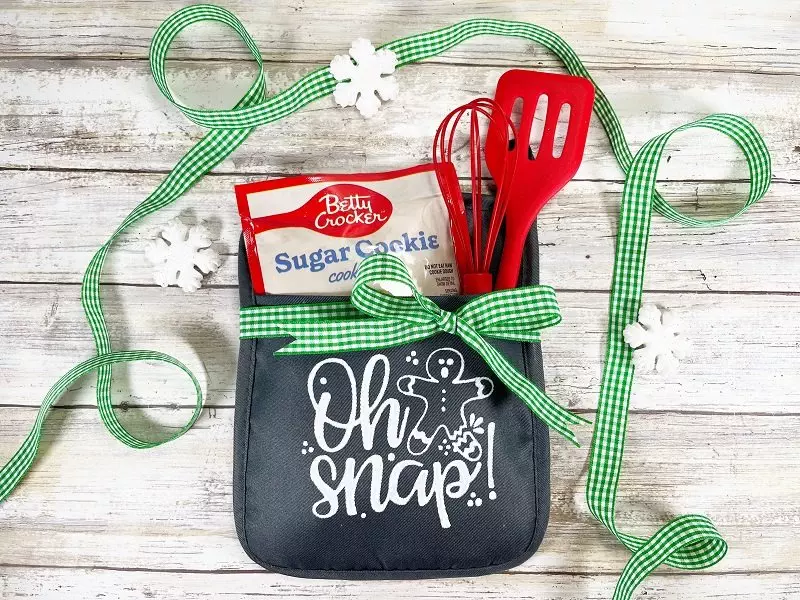
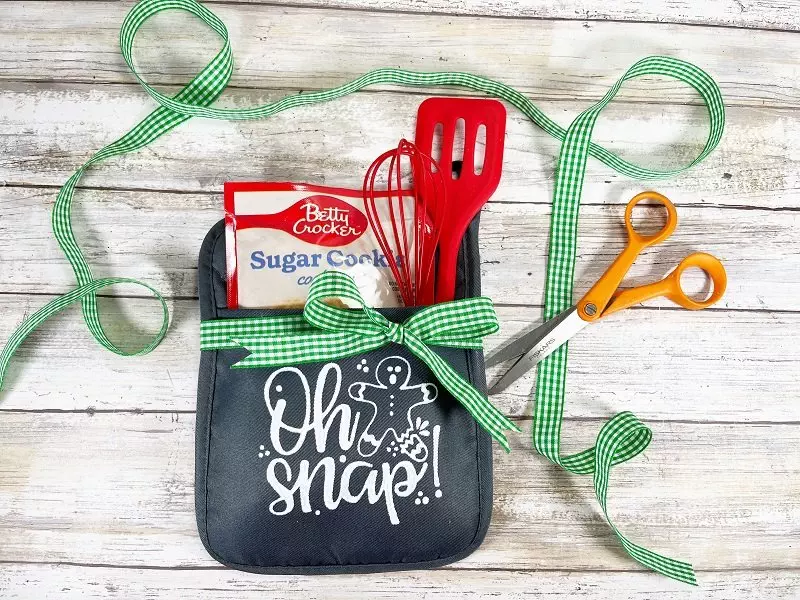
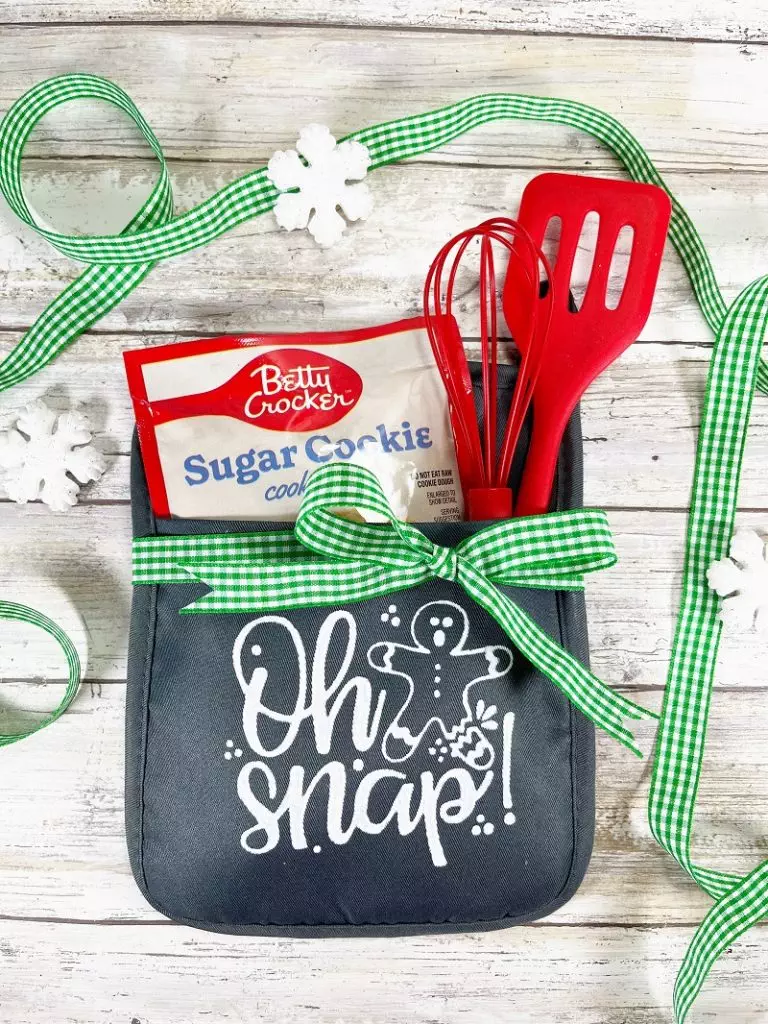
To complete the DIY Stenciled Potholder Cookie Gift, carefully remove the stencil film to reveal the design on your project surface. I always like to practice new techniques on a scrap of material first, prior to completing the finished project. This gives me a feel for how the fabric, stencil, and ink will react and lets me make changes to how I complete the finished stencil. Heat set the Speedball Screen Print Ink for Fabric for 30 seconds with an iron or heat press. The nice part about taping down your stencil is that you can lift the edge and check for coverage and then apply additional paint if necessary. Place the cookie mix, whisk, and spatula in the pocket of the potholder and finish with a green gingham ribbon tied in a bow.
To clean the stencil, get the Ikonart clipboard wet so your stencil does not stick to it. Place the stencil on the clipboard with the textured side up, and lightly run the stencil under running water to remove all the paint. Do not rub or scrub the adhesive side of the stencil, and NEVER use anything other than water to wash the stencils. To prevent the stencil from breaking down, don't ever leave the stencils to soak.
Remove the stencil from the clipboard and lay it down with the adhesive side up. While the stencil is still wet, place the carrier sheet onto the stencil so that the word “BACK” is readable. Hang or lay the stencil flat to dry completely.
Stencils MUST be dry before using, or you could ruin your stencil and/or project surface. Repeat the stenciling process (and washing) again until you are satisfied with the project.
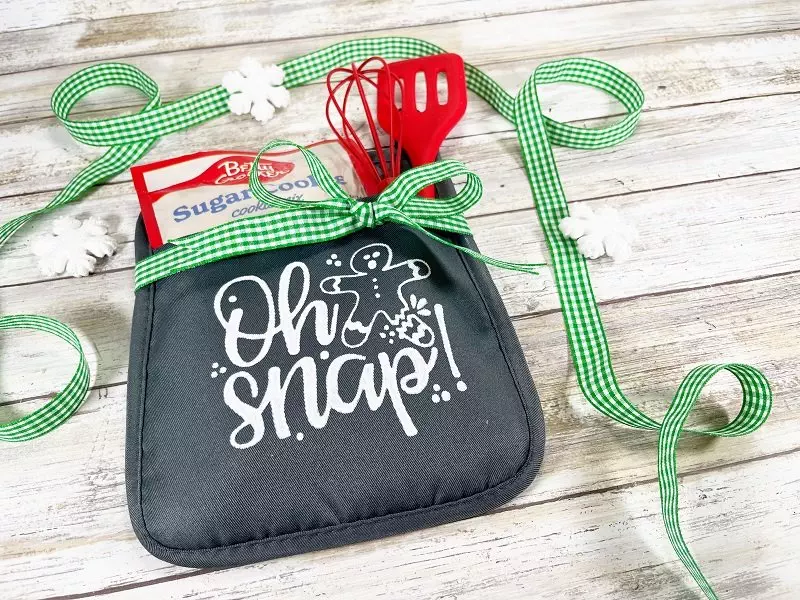
DIY Stenciled Potholder Cookie Gift with Ikonart Stencil Kit
Get into the mood for holiday baking with a potholder baking mix gift set. It makes an inexpensive gift for teachers, co-workers, and neighbors. This project is made with all items bought at Dollar Tree and personalized with the Ikonart Custom Stencil Kit. The possibilities are ENDLESS! Visit the Ikonart website and find everything you need to create custom, reusable stencils using any artwork you want. Get started with the Ikonart Custom Stencil Kit and Textile Add-on Bundle, or shop the line of adhesive Stencil Films, high-quality Printer Films, Inks & Pastes, or Stencil Making Accessories.
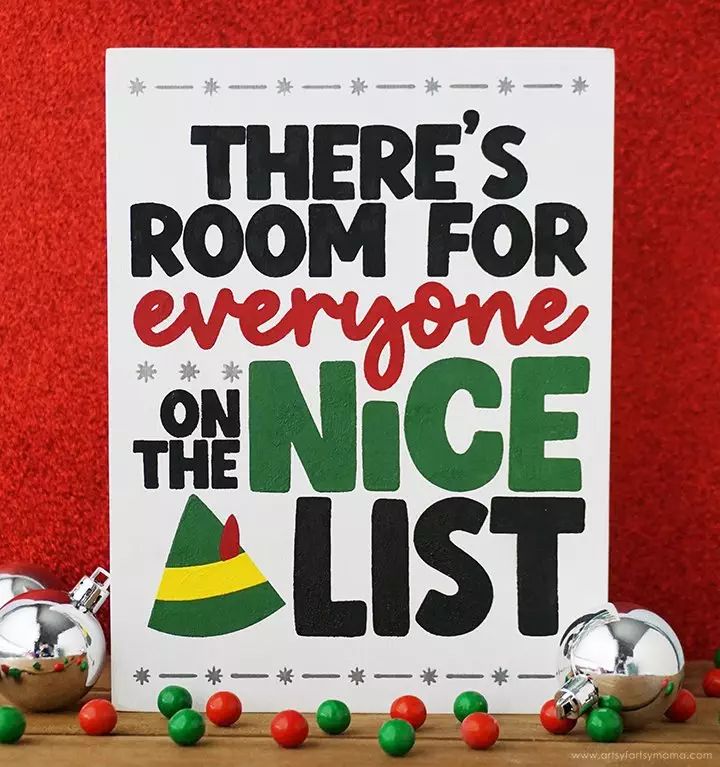
ELF is Lindsay from Artsy Fartsy Mama's favorite Christmas movie, and she may have already watched it multiple times before December even got here… To make the holiday season a little brighter, Lindsay made a Nice List Elf Quote Sign from the movie using a custom stencil she made using the Ikonart kit!! This was such a fun and simple project to make, and I absolutely love how it turned out. It's such a fun and festive piece of holiday decor, and she's sharing the FREE design so that you can make a sign for your own home!!
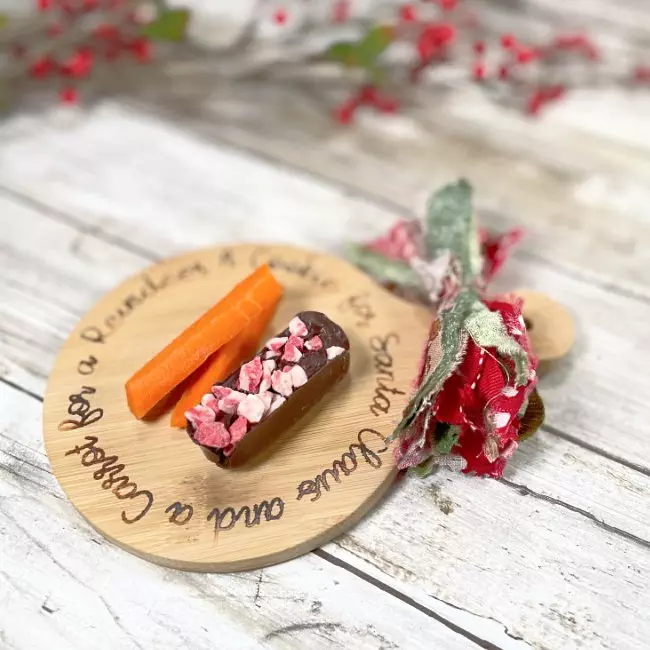
Getting the perfect image, even lettering, burned onto wood is so easy with a DIY stencil using the Ikonart Stencil Kit. Laura from Me and My INKlings is sharing a perfect beginner project for those new to the idea of How to Woodburn a Cutting Board for Santa Cookies. This is an ideal way to showcase your handwriting or that of a loved one. I love the way this project turned out, it is DARLING, and can't wait to try woodburning soon!
Sharing is Caring!
Too busy to make this DIY Stenciled Potholder Cookie Gift for Christmas with the Ikonart Custom Stencil Kit right now? Pin it for later! I'd love for you to pin this project to your favorite craft board on Pinterest and then it’ll be waiting for you when you’re ready.
Thanks for stopping by!

This is an adorable gift set. Perfect for any baker, teacher, or anyone else on your Christmas list. Thank you for sharing at #omhgww. Pinned and tweeted if buttons are available. See you next week.
Thanks a bunch, Cleariss!
This is so cute, I love this idea. Pinned!
And it is EASY to make multiples with the stencil, Antonella!
Hi, Beth! The hosts and I couldn’t stop thinking about this adorable DIY gift idea so I’m excited to tell you this post is being featured in Whimsy Home Wednesday Link party this week! Thanks for joining us and I hope to see you at the party this week! Pinning! https://www.artsandclassy.com/whimsy-home-wednesday-no-8-edition/
YAY, Meredith!! Thak you so much for the feature!